Vinyl fencing is a popular choice for homeowners seeking a durable and low-maintenance option to enhance their property’s aesthetics and security. In this comprehensive guide to vinyl fence installation, we will delve into the benefits of choosing vinyl fencing, the materials and tools required for installation, and step-by-step instructions to ensure a successful project. Whether you are a seasoned DIY enthusiast or a first-time fence installer, this guide will equip you with the knowledge and skills needed to create a beautiful and long-lasting vinyl fence for your home.
Introduction: Understanding the Benefits of Vinyl Fencing
Vinyl fencing offers a multitude of benefits that make it a popular choice among homeowners. Understanding these advantages will help you make an informed decision when considering vinyl fence installation for your property.
Durability and Longevity
One of the primary benefits of vinyl fencing is its exceptional durability and longevity. Unlike traditional wood fences that are prone to rotting, warping, and insect damage, vinyl fences are resistant to these issues. They are designed to withstand harsh weather conditions, including extreme temperatures, heavy rain, and strong winds, without deteriorating or losing their structural integrity. This durability ensures that your vinyl fence will last for years to come, saving you time and money on repairs and replacements.
Low Maintenance
Vinyl fences are virtually maintenance-free, making them an attractive option for busy homeowners. Unlike wood fences that require regular painting, staining, and sealing to maintain their appearance, vinyl fences only need occasional cleaning to remove dirt and debris. A simple wash with a garden hose or mild detergent is usually sufficient to restore the fence’s original beauty. This low-maintenance aspect allows you to enjoy your vinyl fence without the hassle of ongoing upkeep.
Versatility in Design
Vinyl fencing offers a wide range of design options to suit various architectural styles and personal preferences. Whether you prefer a classic picket fence, a privacy fence, or a decorative ornamental fence, vinyl can be manufactured to mimic the appearance of wood, wrought iron, or even stone. Additionally, vinyl fences come in an array of colors, allowing you to choose the perfect shade to complement your home’s exterior. This versatility in design ensures that you can create a fence that not only provides security but also enhances the visual appeal of your property.
Enhanced Privacy and Security
If privacy and security are important to you, vinyl fencing can meet your needs. With solid panel options and no gaps between the boards, vinyl fences offer superior privacy compared to traditional chain-link or wrought iron fences. Additionally, vinyl fences can be built to various heights, providing an added layer of security by deterring intruders and keeping children and pets safely enclosed within your property.
Eco-Friendly Choice
Vinyl fencing is an environmentally friendly choice for several reasons. Firstly, it requires no toxic chemicals, such as paint or sealants, for maintenance. Secondly, vinyl fences are typically made from recycled materials, reducing the demand for new raw materials and minimizing waste. Furthermore, the longevity of vinyl fences means fewer resources are consumed in the long run, making it a sustainable option for homeowners who prioritize environmental conservation.
By understanding the benefits of vinyl fencing, you can confidently embark on your journey to install a durable, low-maintenance, versatile, and eco-friendly fence that will enhance your property for years to come. In the following sections, we will delve into the materials and tools needed, as well as the step-by-step process of vinyl fence installation.
Materials and Tools for Vinyl Fence Installation
To ensure a successful vinyl fence installation, it is essential to gather all the necessary materials and tools beforehand. This section will outline the various components required for the project, as well as the tools that will aid in the installation process.
Choosing the Right Vinyl Fencing Material
Before diving into the installation process, it is important to select the appropriate vinyl fencing material for your project. Consider factors such as the desired fence style, height, and color that will best suit your property. Additionally, ensure that the vinyl material meets industry standards for durability and UV resistance to withstand the elements.
Essential Tools for Installation
1. Measuring Tape: Accurate measurements are crucial for a precise and level fence installation. A quality measuring tape will help ensure the proper placement of posts and panels.
2. Level: A level is essential to ensure the fence is installed evenly and straight. Both a spirit level and a laser level can be useful for this purpose.
3. Post Hole Digger: This tool is necessary for digging the holes in which the fence posts will be placed. Manual post hole diggers or power augers can be used, depending on the scale of the project.
4. Shovel: A sturdy shovel will assist in removing excess soil and debris from the post holes.
5. Concrete Mix: Concrete is used to secure the fence posts in the ground, providing stability and longevity. Choose a high-quality concrete mix suitable for outdoor use.
6. Hammer: A hammer is needed for driving nails or fence caps onto the posts, as well as for any necessary adjustments during the installation process.
7. Screwdriver or Drill: Depending on the type of fasteners used, a screwdriver or drill will be required to secure the fence panels to the posts.
8. Saw: A saw will be useful for cutting vinyl fence panels to the desired length, if necessary.
9. Safety Gear: To ensure personal safety during the installation process, it is important to have safety goggles, work gloves, and sturdy footwear.
Safety Gear You Might Need
1. Safety Goggles: Protect your eyes from flying debris, dust, or any potential hazards during the installation process.
2. Work Gloves: Quality work gloves will provide hand protection and a better grip on tools.
3. Sturdy Footwear: Choose footwear with good traction and ankle support to prevent slips or injuries while working on uneven terrain.
By gathering all the necessary materials and tools before starting the installation process, you will save time and ensure a smoother and more efficient vinyl fence installation. In the following sections, we will explore how to prepare your yard for fence installation, followed by a step-by-step guide to the installation process itself.
How to Prepare Your Yard for Fence Installation
Before embarking on the installation of your vinyl fence, it is crucial to properly prepare your yard. This section will guide you through the necessary steps to ensure a smooth and successful installation process.
Measuring and Marking Your Fence Line
1. Determine the Property Boundaries: Before marking your fence line, locate and clearly define your property boundaries. This can be done by referring to your property survey or consulting with a professional surveyor.
2. Measure and Plan: Use a measuring tape to determine the length of your fence line accurately. Consider any angles or corners that may affect the layout of the fence. Plot the fence line on a diagram or sketch to help visualize the placement of posts and panels.
3. Mark the Fence Line: Using stakes or flags, mark the fence line along the measured and planned route. Ensure the markings are visible and easily distinguishable throughout the installation process.
Ensuring a Level Ground
1. Clear the Area: Remove any obstacles such as rocks, tree roots, or vegetation along the fence line. Clearing the area will ensure a smooth and even installation process.
2. Level the Ground: Use a shovel and a rake to level the ground along the fence line. Remove excess soil or fill in any low spots to create a flat and even surface. This will help maintain the stability and integrity of your vinyl fence.
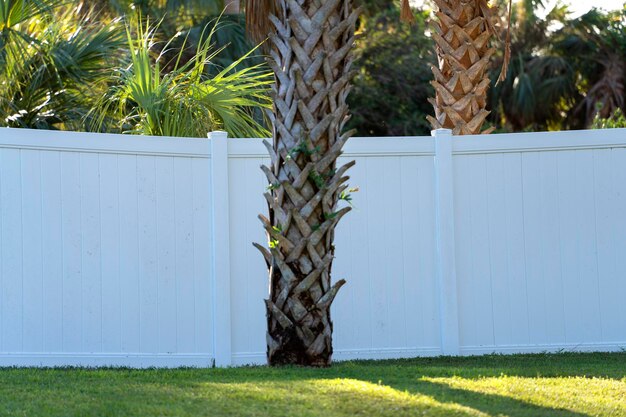
Dealing with Obstacles like Trees and Shrubs
1. Assess Tree and Shrub Placement: Take note of any existing trees or shrubs along the fence line that may interfere with the installation. Consider their size and growth potential, as well as their impact on the fence’s stability and aesthetics.
2. Trim or Relocate Vegetation: If necessary, trim back branches or remove shrubs that are in the way of the fence line. Alternatively, you may choose to relocate certain plants to another area of your yard to accommodate the fence installation.
3. Plan for Tree Growth: If there are trees near the fence line that may grow and potentially affect the fence in the future, consider installing the fence a safe distance away from their root systems. This will prevent any damage or interference as the trees mature.
By following these steps to prepare your yard for fence installation, you will ensure that the installation process goes smoothly and that your vinyl fence is installed on a level and stable surface. The next section will provide a detailed step-by-step guide to the vinyl fence installation process.
Step-by-Step Guide to Vinyl Fence Installation
Installing a vinyl fence may seem like a daunting task, but with the right approach and careful execution, it can be a manageable and rewarding project. This section will provide you with a step-by-step guide to help you navigate the vinyl fence installation process.
Digging Post Holes
1. Determine Post Spacing: Refer to your fence manufacturer’s guidelines to determine the recommended spacing between fence posts. Typically, it is recommended to place posts approximately 6 to 8 feet apart.
2. Mark Post Hole Locations: Using the previously marked fence line as a guide, use spray paint or stakes to mark the locations where the fence posts will be installed.
3. Dig Post Holes: Using a post hole digger or power auger, dig holes at each marked location. The depth of the holes should be determined by the height of your fence panels and the frost line in your area. Typically, a depth of 1/3 to 1/2 of the total post length is recommended.
Installing Fence Posts
1. Prepare the Holes: Remove any excess dirt or debris from the post holes. Ensure that the holes are free from water or moisture.
2. Set the Posts: Place the vinyl fence posts into the prepared holes. Make sure each post is level and plumb using a spirit level. Temporarily brace the posts in position using stakes or clamps.
3. Fill with Concrete: Pour concrete mix into each post hole, ensuring that it fills around the post and reaches the desired depth. Follow the manufacturer’s instructions for mixing and setting time.
4. Check for Alignment: Double-check the alignment and vertical position of each post. Make any necessary adjustments before the concrete sets. Use the level to ensure that the posts are perfectly straight.
5. Allow the Concrete to Cure: Follow the concrete manufacturer’s instructions for curing time. It is generally recommended to allow the concrete to cure for at least 24 to 48 hours before proceeding with the installation of the fence panels.
Attaching Vinyl Fence Panels
1. Measure and Cut Panels: Measure the distance between the installed posts to determine the required length of each fence panel. Use a saw to cut the vinyl fence panels to the appropriate size, if necessary.
2. Slide Panels into Place: Starting at one end of the fence line, slide the bottom rail of the first fence panel into the pre-cut slots on the fence posts. Ensure that the panel is level and aligned properly.
3. Secure Panels: Use screws or other appropriate fasteners recommended by the manufacturer to secure the fence panels to the posts. Follow the manufacturer’s instructions for proper installation techniques.
4. Repeat the Process: Continue installing the remaining fence panels, ensuring a consistent and level installation. Make any necessary adjustments to ensure proper alignment and spacing between panels.
Securing the Fence and Adding Finishing Touches
1. Secure the Top Rail: Once all the fence panels are installed, attach the top rail of the fence using screws or other recommended fasteners. This will provide additional stability and support.
2. Install Post Caps: Attach post caps to the top of each fence post to provide a finished and polished look. Post caps also help protect the posts from moisture and debris.
3. Trim Excess Length: If any fence panels extend beyond the desired length, use a saw to trim them to the appropriate size. Ensure a clean and uniform appearance.
4. Double Check and Clean Up: Walk along the installed fence line to ensure that all panels are securely attached and aligned properly. Clean up any debris or excess materials from the installation process.
By following these step-by-step instructions, you will be well on your way to successfully installing your vinyl fence. In the next section, we will discuss how to maintain your vinyl fence to ensure its longevity and aesthetic appeal.
Maintaining Your Vinyl Fence
Proper maintenance is crucial for preserving the beauty and longevity of your vinyl fence. While vinyl fencing requires minimal upkeep compared to other materials, regular care and inspections are still necessary. This section will provide you with essential maintenance tips to keep your vinyl fence looking its best.
Cleaning and Washing Your Vinyl Fence
1. Regular Cleaning: Clean your vinyl fence regularly to remove dirt, dust, and other debris. A simple rinse with a garden hose is often sufficient. For tougher stains, use a mild detergent mixed with water and gently scrub the affected areas using a soft brush or sponge. Avoid using abrasive cleaners or tools that may scratch or damage the surface of the vinyl.
2. Removing Mold and Mildew: If you notice mold or mildew on your vinyl fence, mix a solution of 1 part bleach to 3 parts water. Apply the solution to the affected areas and let it sit for a few minutes. Then, scrub the area gently and rinse thoroughly with water. Always wear protective gloves and eyewear when working with bleach.
3. Preventing Stains: To minimize the risk of staining, promptly clean any spills or stains that come into contact with your vinyl fence. This includes substances like oil, grease, paint, or rust. Use appropriate cleaning methods and products recommended by the manufacturer.
Inspecting for Damage and Making Repairs
1. Regular Inspections: Routinely inspect your vinyl fence for any signs of damage, including cracks, chips, or loose components. Inspections should be done at least once a year or after severe weather events.
2. Repairing Cracks or Chips: If you notice any cracks or chips in your vinyl fence, use a vinyl repair kit or adhesive recommended by the manufacturer to fix the damage. Follow the instructions carefully and allow sufficient curing time before applying any pressure or stress to the repaired area.
3. Reinforcing Loose Components: If you find any loose components, such as fence panels or posts, tighten or reattach them using appropriate screws or fasteners. Ensure that all connections are secure and stable.
Preventative Measures to Extend Fence Life
1. Trim Vegetation: Regularly trim and maintain any vegetation near your vinyl fence, as overgrown plants can cause damage or discoloration over time. Avoid allowing vines or plants to grow on or around the fence, as they can cause moisture buildup and potential damage.
2. Protect from Heavy Objects or Equipment: Avoid placing heavy objects or equipment against your vinyl fence, as they could cause dents, cracks, or other forms of damage. Be cautious when using lawnmowers, trimmers, or other tools near the fence to prevent accidental impact.
3. Protect from Extreme Heat: Vinyl fences can be sensitive to extreme heat, so take precautions to protect your fence from high temperatures. Avoid placing grills, fire pits, or other heat sources too close to the fence. Consider installing heat-resistant barriers if necessary.
By following these maintenance guidelines, you can ensure the longevity and attractiveness of your vinyl fence. Regular cleaning, inspections, and repairs will help preserve its appearance and functionality for years to come.
Conclusion
Congratulations! You have now completed the comprehensive guide to vinyl fence installation. By understanding the benefits of vinyl fencing, gathering the necessary materials and tools, preparing your yard, following the step-by-step installation instructions, and maintaining your fence properly, you can enjoy a durable, low-maintenance, and aesthetically pleasing vinyl fence for your property. Remember to consult with professionals or reference manufacturer guidelines whenever necessary to ensure a successful installation. Happy fencing!